Ever get that late-afternoon craving for something sweet, but the thought of a sugar crash or a mountain of dirty dishes stops you in your tracks? We’ve all been there. But what if I told you that the secret to guilt-free, single-serving treats is already sitting on your kitchen counter? This guide on how to make desserts with a personal blender will transform your trusty smoothie maker into a bona fide dessert wizard. Forget complicated recipes and long cleanup times. We’re about to dive into a world of creamy, delicious, and surprisingly healthy desserts that you can whip up in minutes. Ready to give your sweet tooth what it wants, the smart way?
Why Your Personal Blender is a Dessert-Making Genius
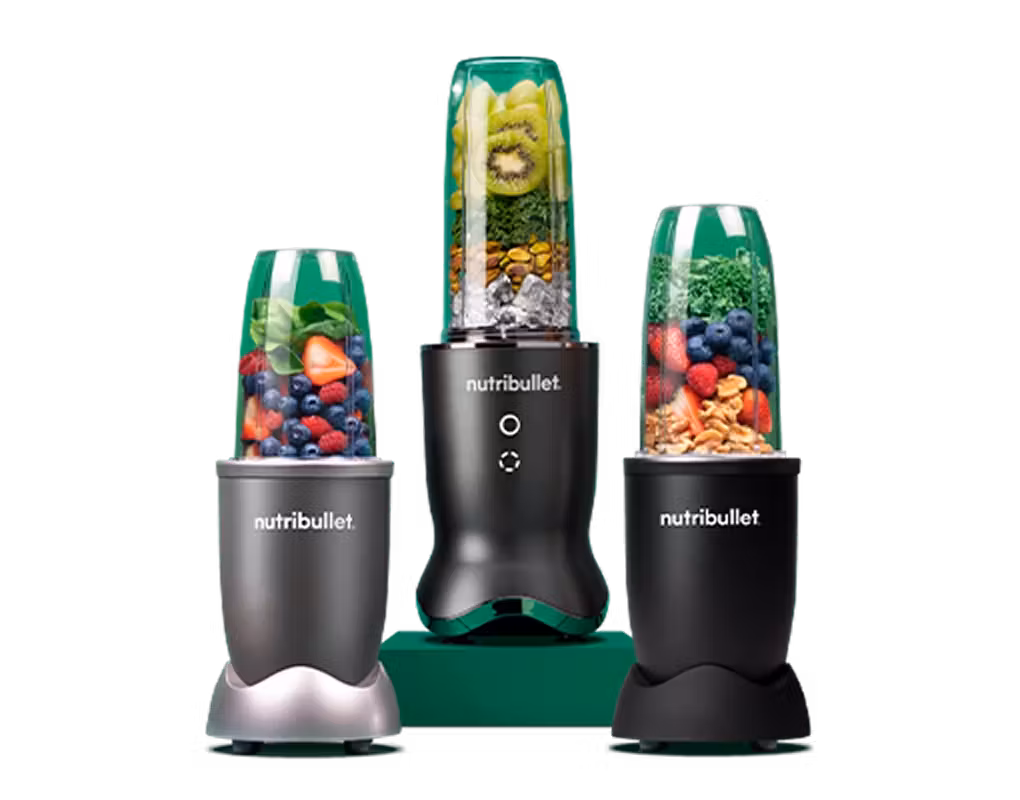
Before we get to the recipes, let’s talk about why your personal blender is the perfect tool for the job. It’s not just about smoothies, folks. This compact powerhouse has a few secret weapons that make it ideal for crafting sweet treats.
- Perfect Portion Control: The single-serving cup is your built-in guard against overindulgence. You make just enough to satisfy your craving, which is a game-changer for anyone mindful of their health goals.
- Speed and Convenience: From start to finish, you can have a delicious dessert ready in under five minutes. There’s no preheating the oven or waiting for things to set. It’s instant gratification, but healthier.
- Healthier Ingredients: You have complete control over what goes in. Swap refined sugar for dates or maple syrup, use frozen fruit for natural sweetness and a thick texture, and sneak in healthy fats from avocado or nuts.
- Minimal Cleanup: This might be the best part. Blending and drinking from the same cup means you only have one container and a blade lid to wash. It’s the dream scenario for anyone who dislikes doing dishes.
The Secret to Success: What Makes a Great Dessert Blender?
Not all personal blenders are created equal, especially when you venture beyond simple protein shakes. If you’re serious about making silky-smooth mousses or creamy “nice” cream, a few key features are non-negotiable.
Motor Power (Watts Matter, But How Much?)
For desserts, especially those using frozen fruit or nuts, you need a bit of muscle. A blender with at least 300-600 watts will do a decent job, but if you want exceptionally smooth results without the motor struggling, look for something in the 700-1000 watt range. This power ensures it can pulverize frozen bananas and cashews into a luscious, creamy texture without leaving chunks behind.
Blade Design (The Unsung Hero)
The blade is where the magic happens. Look for high-quality, stainless steel blades with a multi-pronged design. Some blades are designed to pull ingredients down into a vortex, which is perfect for creating that even, consistent blend necessary for desserts like sorbet and mousse.
Jar Material and Size (BPA-Free is a Must!)
Always opt for a blending cup made from BPA-free Tritan plastic. It’s durable, shatter-resistant, and won’t leach harmful chemicals into your food. The typical 16-24 oz (approx. 470-700 ml) size is perfect for a generous single-serving dessert.
Let’s Get Blending: Easy Recipes Showcasing How to Make Desserts With a Personal Blender
Alright, theory’s over. It’s time to put that blender to work! These recipes are designed to be foolproof, delicious, and show off the incredible versatility of your compact appliance.
The 2-Minute “Nice” Cream
This is the quintessential personal blender dessert. It’s dairy-free, has no added sugar, and tastes incredibly indulgent.
You’ll Need:
- 1 large banana, frozen in chunks
- 2 tablespoons of milk of your choice (almond, oat, dairy)
- Optional: 1 tablespoon of peanut butter or a teaspoon of cocoa powder.
Instructions:
- Add the milk to your personal blender cup first. This helps the blades get going.
- Add the frozen banana chunks and any optional add-ins.
- Screw on the blade lid and blend until completely smooth. You may need to stop and shake the cup once or twice to make sure everything gets incorporated.
- Scoop into a bowl and enjoy immediately for a soft-serve texture, or freeze for 20 minutes for a firmer scoop.
Decadent Chocolate Avocado Mousse
Sounds weird, tastes divine. The avocado provides an unbelievably creamy texture and healthy fats, while the cocoa gives it a rich, chocolatey flavor. No one will ever guess the secret ingredient.
You’ll Need:
- ½ a ripe avocado
- 2 tablespoons of unsweetened cocoa powder
- 2-3 tablespoons of maple syrup or honey (to your taste)
- 1 teaspoon of vanilla extract
- A pinch of salt
- 2-3 tablespoons of plant-based milk to help it blend
Instructions:
- Place all ingredients into your blender cup, starting with the milk.
- Blend on high until the mixture is silky smooth and no green specks remain. You might need to scrape down the sides of the cup once.
- Pour into a small bowl or ramekin and chill for at least 30 minutes to let it set.
Quick Berry Sorbet
Craving something fruity and refreshing? This three-ingredient sorbet is your answer.
You’ll Need:
- 1.5 cups of frozen mixed berries
- 1-2 tablespoons of lemon juice
- 1 tablespoon of honey or agave syrup (optional, depending on berry sweetness)
Instructions:
- Add the lemon juice and sweetener to the blender cup.
- Top with the frozen berries.
- Pulse a few times to break up the fruit, then blend on high until it forms a thick, sorbet-like consistency. Scrape the sides as needed.
- Serve immediately for the best texture.
Pro Tips for Perfect Blender Desserts Every Time
Learning how to make desserts with a personal blender comes with a few tricks of the trade. I’ve made all the mistakes so you don’t have to.
- Layer Smart: Always add your liquids or softest ingredients first (like milk, yogurt, or avocado). This creates a vortex that helps pull the harder, frozen ingredients down into the blades.
- Don’t Overfill: Respect the “Max Fill” line on your cup. Overloading the blender prevents ingredients from circulating properly, leading to a chunky, uneven blend.
- Embrace the Pulse: For tougher ingredients like dates or frozen fruit, use the pulse function a few times to break them down before going for a full-power blend. This protects your motor and gives a better result.
- Scrape It Down: Don’t be afraid to stop the blender, unscrew the lid, and use a spatula to scrape down the sides. This ensures every last bit gets blended into creamy perfection.
“A personal blender is a game-changer for satisfying dessert cravings without derailing your health goals. The key is to use whole-food ingredients like frozen fruit for sweetness and texture, and healthy fats from nuts or avocado for creaminess. It’s about making smart swaps, not sacrifices.”
– Dr. Alisha Chen, Registered Dietitian
Keeping It Clean: The Easiest Way to Clean Your Blender
The beauty of the personal blender is the easy cleanup. Don’t let it sit in the sink. Clean it right after you use it with this 30-second trick:
- Rinse the cup and blade lid quickly under warm water.
- Fill the cup about halfway with warm water.
- Add one drop of dish soap.
- Screw the blade lid back on and blend for 10-15 seconds.
- Pour out the soapy water, give it a final rinse, and you’re done!
Frequently Asked Questions (FAQ)
Can I use a personal blender to crush ice for desserts?
It depends on the blender’s power. Blenders with 700 watts or more can typically handle small amounts of ice or crush it when mixed with liquid. However, trying to blend only ice can strain the motor. It’s better to use frozen fruit to achieve a cold, thick texture.
My blender dessert isn’t smooth, what did I do wrong?
This is usually due to one of three things: not enough liquid, overloading the cup, or not blending long enough. Try adding a tablespoon more liquid, ensuring you’re below the max fill line, and letting it blend for an extra 20-30 seconds.
Are there any desserts I shouldn’t try to make in my personal blender?
Yes. Avoid trying to grind very hard, dry ingredients like whole coffee beans or hard grains (unless your manual says it’s okay). Also, avoid blending hot liquids, as the pressure can build up and be dangerous. Stick to cold or room-temperature ingredients.
How do I make my blender desserts thicker without adding ice?
The best trick is to use frozen ingredients. Frozen bananas are the gold standard for a creamy, ice-cream-like base. Frozen mango, pineapple, and berries also work well. Adding a spoonful of chia seeds or a small amount of avocado can also add thickness and creaminess.
What’s the best personal blender for making desserts?
The best one for you will have a powerful motor (700W+), sharp stainless steel blades, and a durable, BPA-free cup. Look for a model that’s known for its ability to handle frozen ingredients smoothly, as this is the key to many great dessert recipes.
Your Dessert Journey Starts Now
As you can see, the possibilities are nearly endless when you know how to make desserts with a Personal Blender. It’s more than just a gadget; it’s your partner in creating quick, delicious, and nourishing treats that fit perfectly into a busy, health-conscious lifestyle. So go ahead, experiment with new flavors, and embrace the sweet life, one single-serving dessert at a time. What will you create first?